
Importing your asset data from another GIS application (such as ARC or QGIS) can be accomplished by using the Shape file format.
Gully SMART will import the data and update the system with the new assets.
Importing from a Shape File
From the main menu, click Operations.
Click Import Assets.
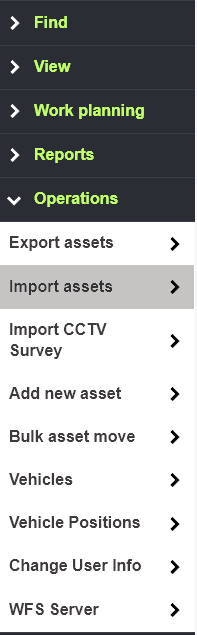
Click to select the type of assets to be imported.

Enter any comments to be added to the assets upon import. You can use this to tag where the original data came from, the import date etc.

Click Choose file to select the file to upload.

The shape files should be contained within a zip archive. make sure to include all parts of the shapefile system, including the .shp, .shx, .prj and .dbf files.
Browse to the file and click Open.
Once the file has been selected, click Upload.

The shapefile is scanned for data and then you will be prompted to map the necessary fields to the KaarbonTech database.
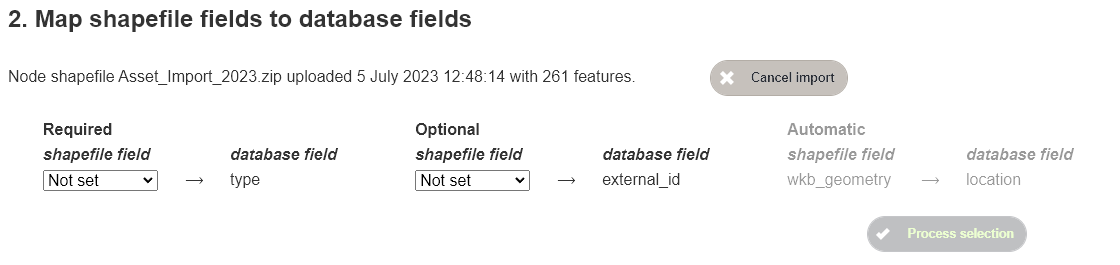
The mapping fields offered will differ depending on the asset type being imported, and the data that is held in the shapefile.
The system will automatically generate a new ID for each individual asset, but you can select to manually map the following to also be imported:
- Asset Type: Gullies, Manholes, ditches etc. this should be set to the shapefile field that contains this information.
- External ID: If you want to include the original reference number from the originating system, select the appropriate filed here.
- Channel material: When importing channels, you can select the material data to be imported.
- Channel Diameter: Import the diameter of channels/pipes here.
Available asset types and associated values are as follows:
Nodes:
- Catchpit or CP
- Comment
- Cover or OC
- Ghost Node or GN
- Gully or GY
- Headwall or HW
- HydroBrake or HB
- Inlet
- Interceptor or OS or IN
- Manhole or MH
- Outfall or OU
- Outlet
- PumpingStation or PS
- Rodding Eye or RE
- Soakaway or SK or SO
- Trash Screen or TS
Channels:
- 'Pipe' or 'PW'
- 'Culvert' or 'CU'
- 'Filter' or 'FD'
- 'Slot Drain' or 'ND'
- 'Ditch' or 'DI'
- 'Grip' or 'GP'
- 'Kerb Drain' or 'CK'
- 'Dish Channel' or 'DC'
- 'Counterfort Drain' or 'CD'
- 'Fin drain' or 'FN'
- 'Swale or Grassed Channel or 'SC'
- 'Drainage Channel Block' or 'DB'
- 'Land Drainage LD Syphon (inverted)' or 'SY'
- 'Surface Water Channel' or 'CH'
- 'Edge Channel' or 'EC'
- 'Drainage Channel Block' or 'DB'
- Other
Channel Material:
- 'Concrete' or 'CO'
- 'Brick' or 'BK'
- 'Clay' or 'VC'
- 'Plastic' or 'PV'
- 'Stone' or 'ST'
- 'Cast Iron' or 'CI'
- 'Pitch Fibre' or 'PF'
- 'MDPE' or 'MD'
- 'HPPE' or 'HE'
- 'Asbestos Cement' or 'AC'
- 'Other'
Once the mapping is complete, click Process selection.

The final step is to select the organisation that has responsibility for maintaining the assets. Select from the available list, and then click Insert Data to complete the import.
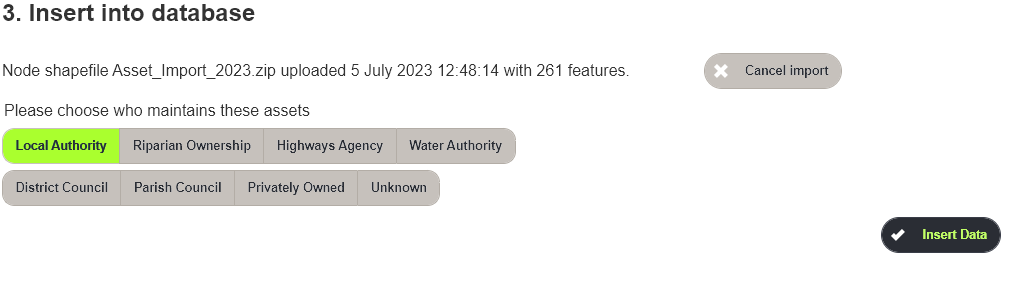
The assets are imported into the system.
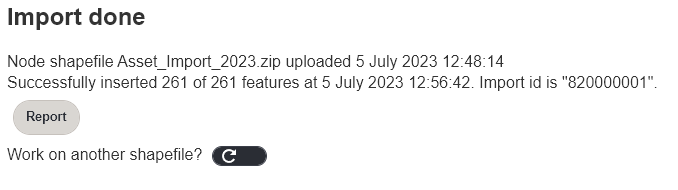
Click Report to run a state report on the imported assets, or the refresh button to import another file.