
On the map, Zoom in to the location where the asset is to be added.
From the main menu, click Operations, then Add new asset.
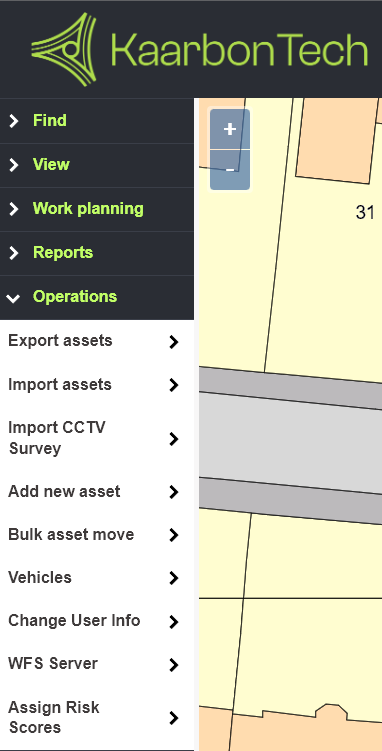
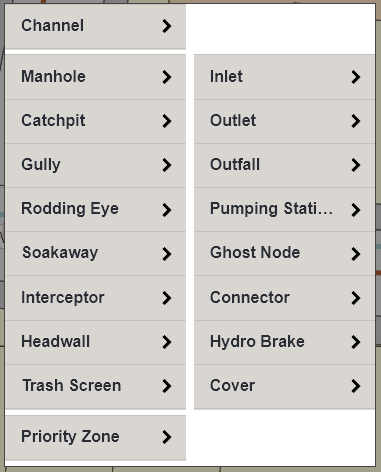
Click to select the asset type from the menu.
Adding a Node
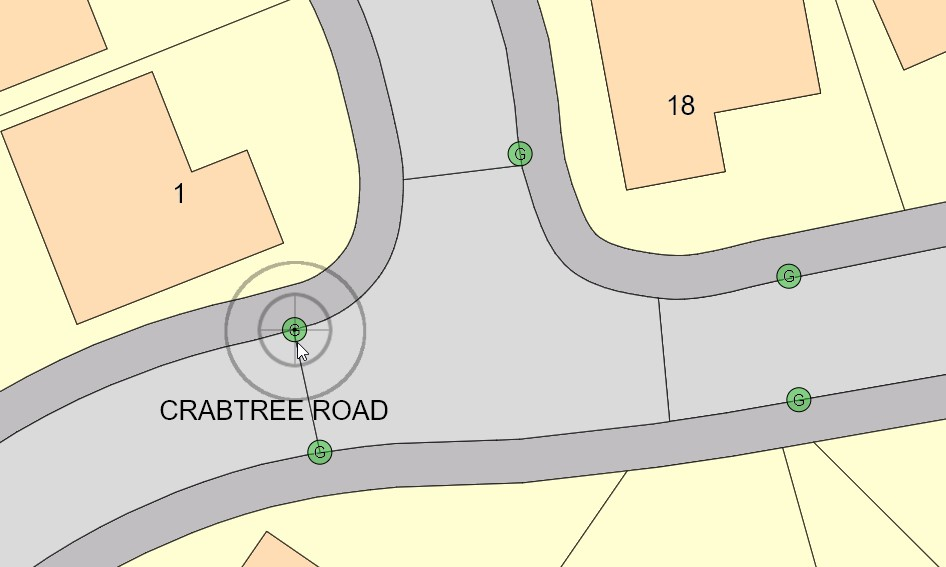
When adding a node asset type, a target will appear on screen in the centre of the map. Drag the target so that the crosshairs at the centre align with the desired location.
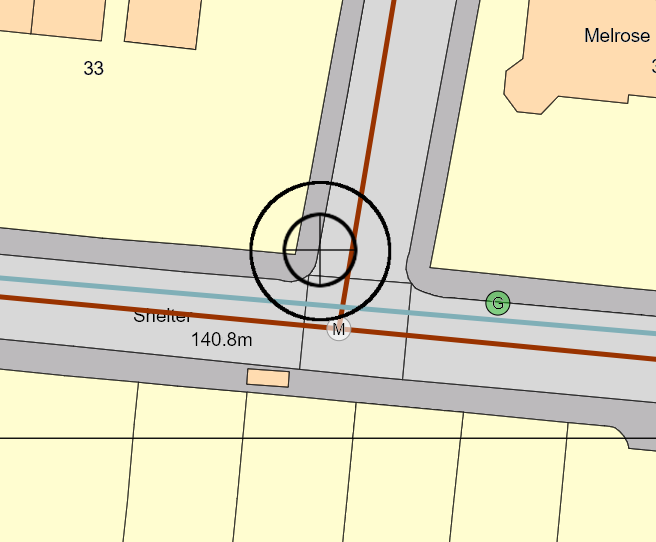
When the target matches the desired location, tap Done in the left hand menu to add the node at that location.
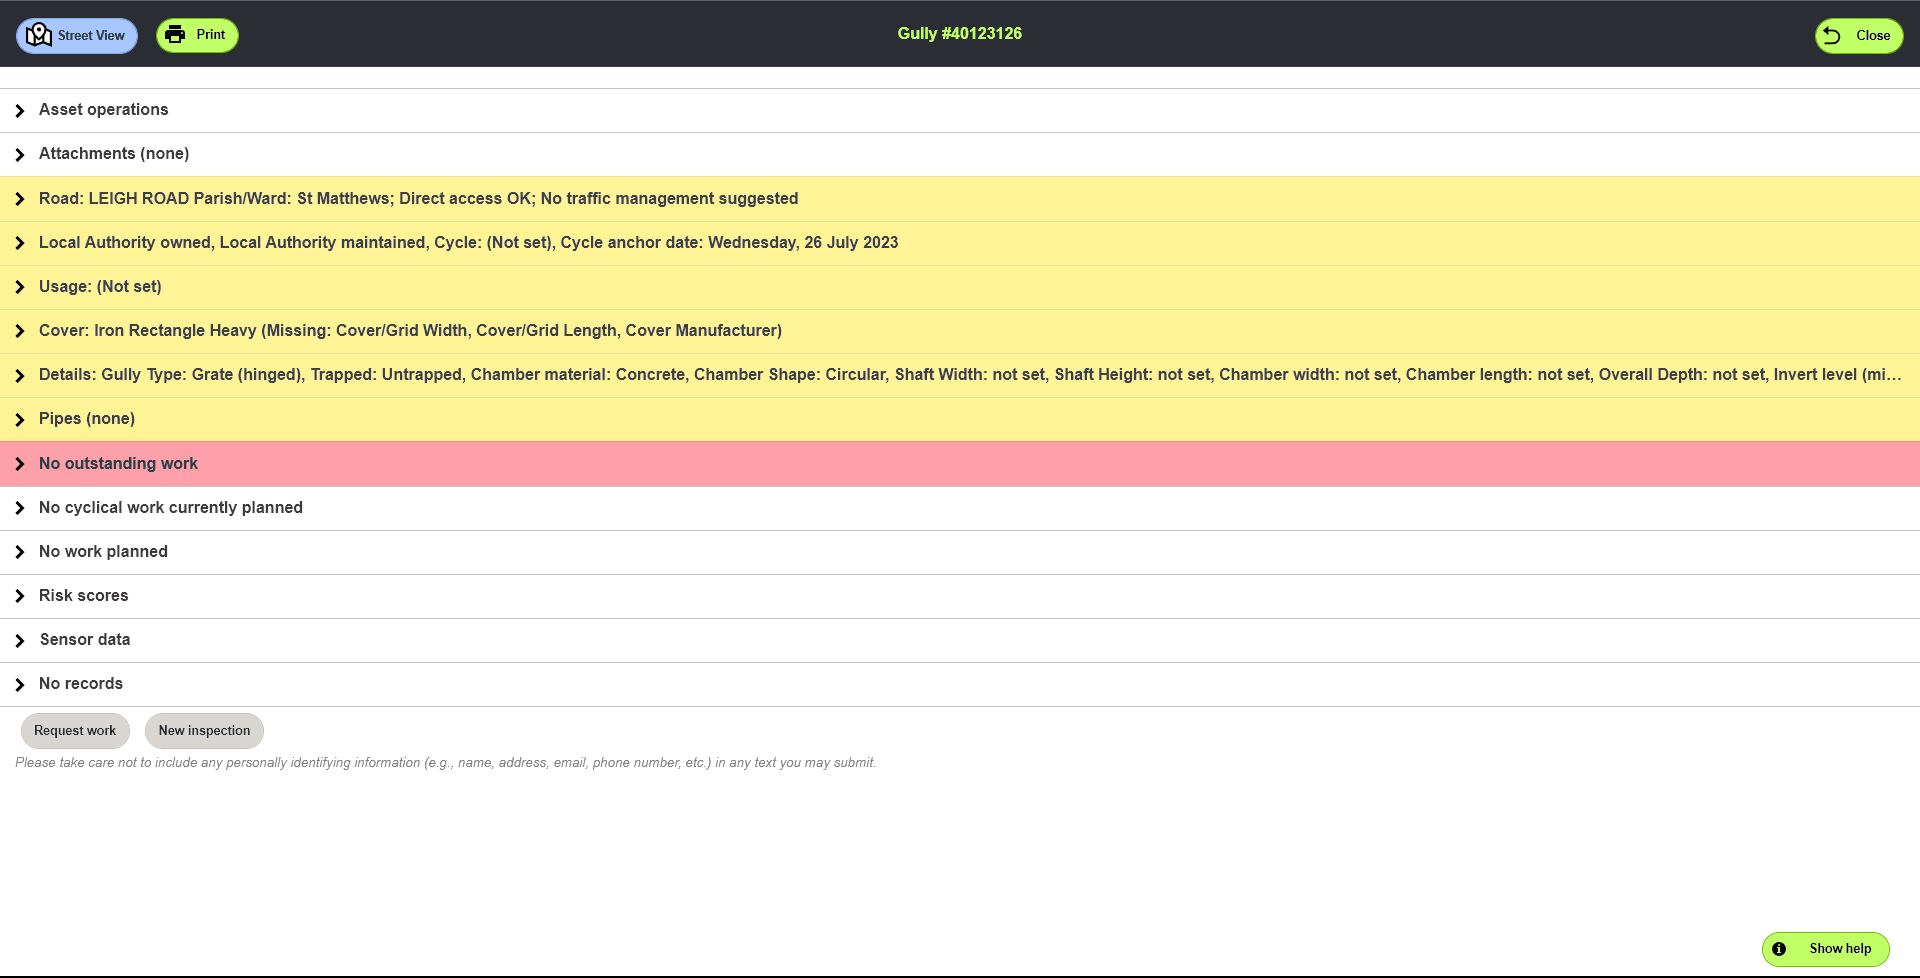
Enter the details of the asset as required.
Adding Channels
When adding a channel, no target will appear. The system needs you to map tthe two ends of the channel. This can be in any location, but you can also snap the ends to existing node assets.
Note: The system always maps in a downstream direction, so when mapping a new channel, start at the upstream end.
Click the location of the upstream end of the channel. A target will appear marking the spot.

Tap the downstream end of the channel. A second target will appear.
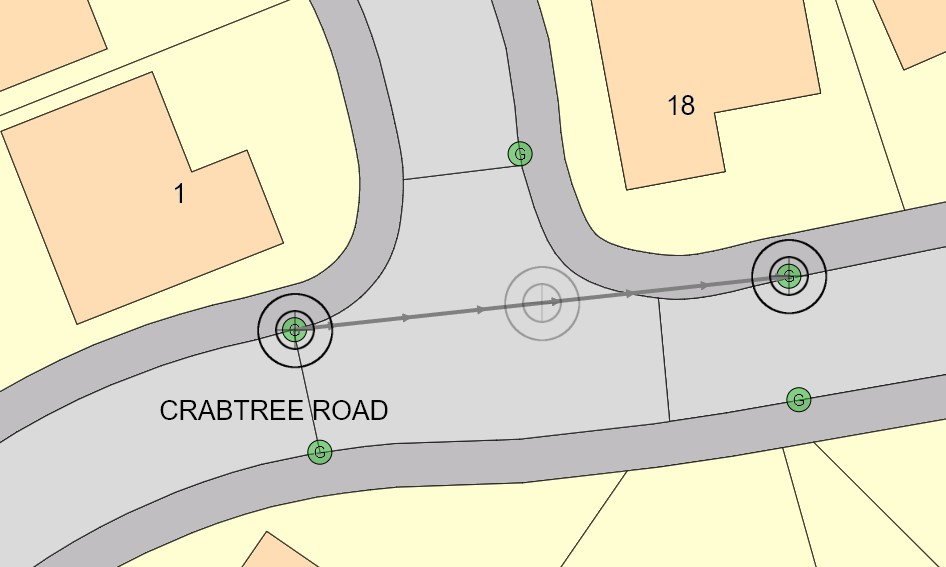
If you are happy with the channel, Click Done
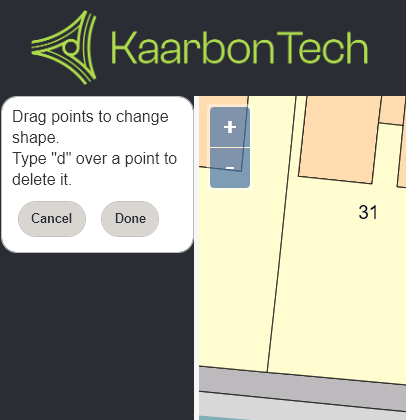
If you are not happy, you can drag the ends to move them. you can also tap and drag the centre grey target to add a bend in the middle.
Note: If you have connected both ends to a node as in the example here, you will not be able to adjust the channel. but you can do this later.
Click Done to save the channel.
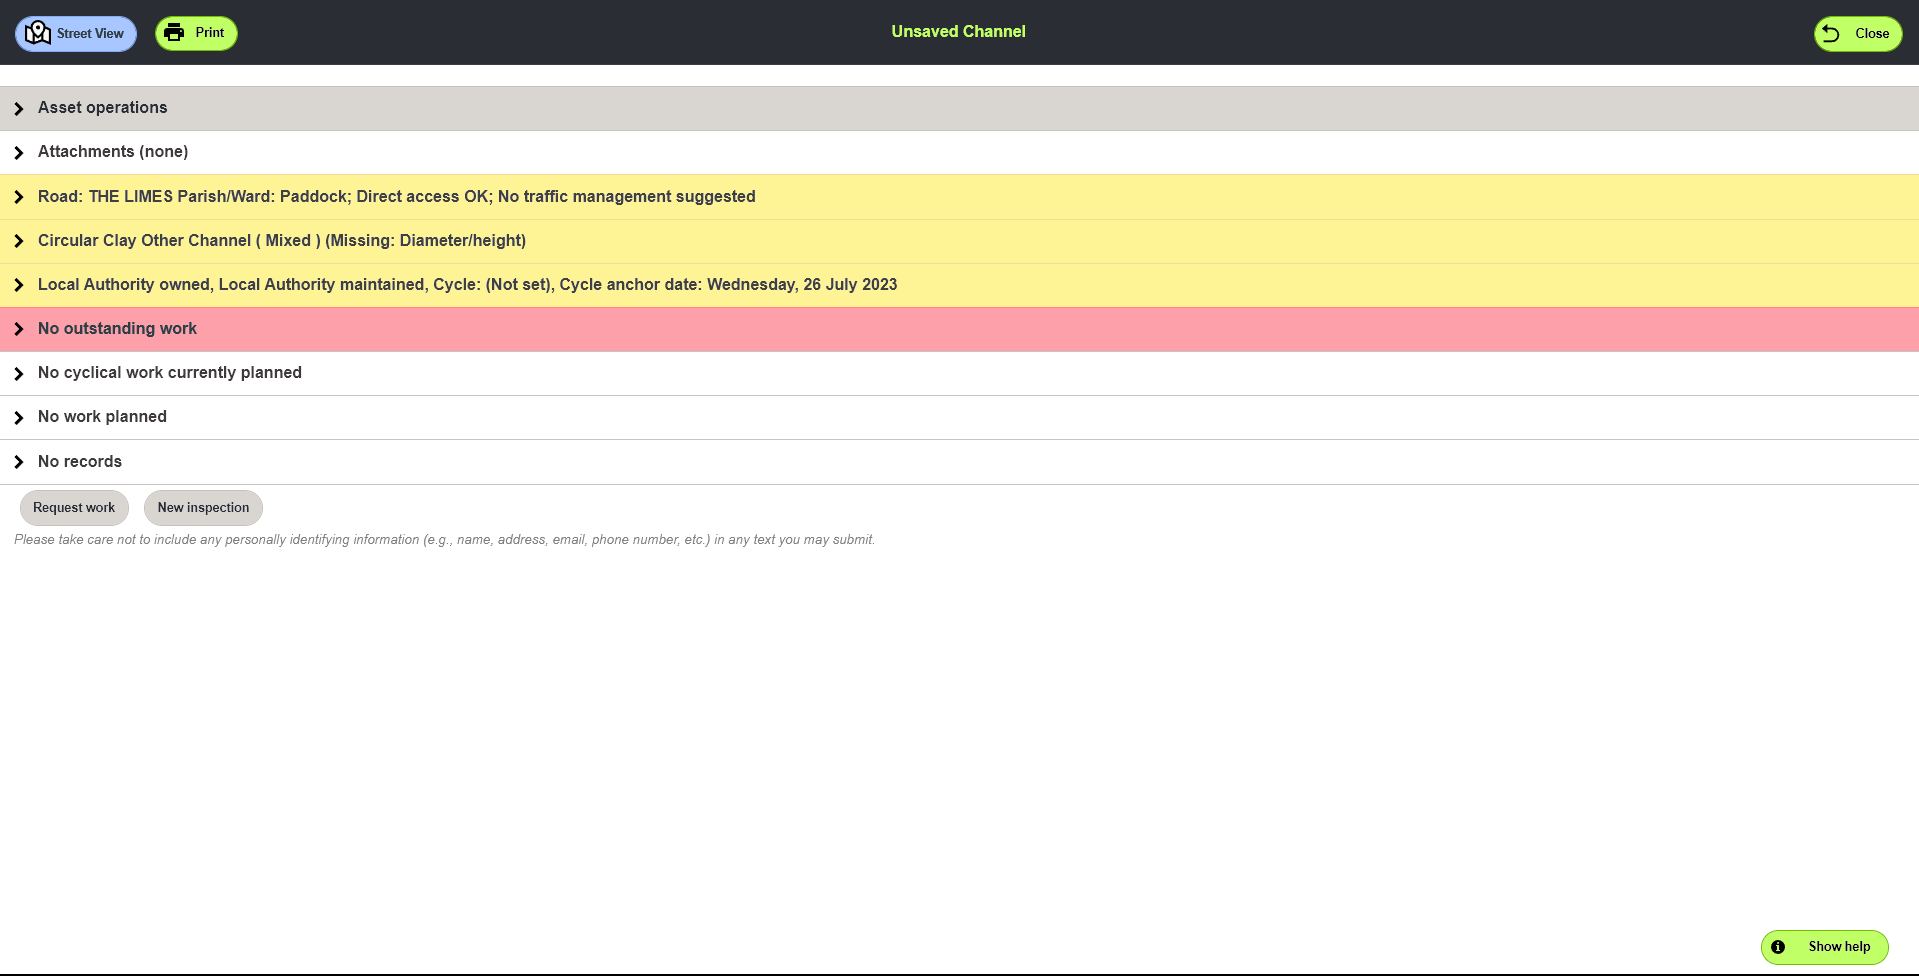
Enter the details as required

Adding a Bend in a Channel
To add a bend in a channel, there are two methods. You can tap and drag the centre target as described above, or you can do it when first adding the channel.
Tap the location of the upstream end of the channel.
Click the next location of the bend. Repeat this step as necessary. This allows you to map around corners, finishing with the downstream end of the channel.

Tap OK.
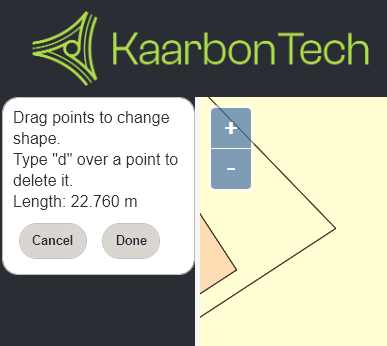
Adjust the channel if necessary by dragging the relevant points.
Click Done to create the channel.

Add the details of the asset as required.
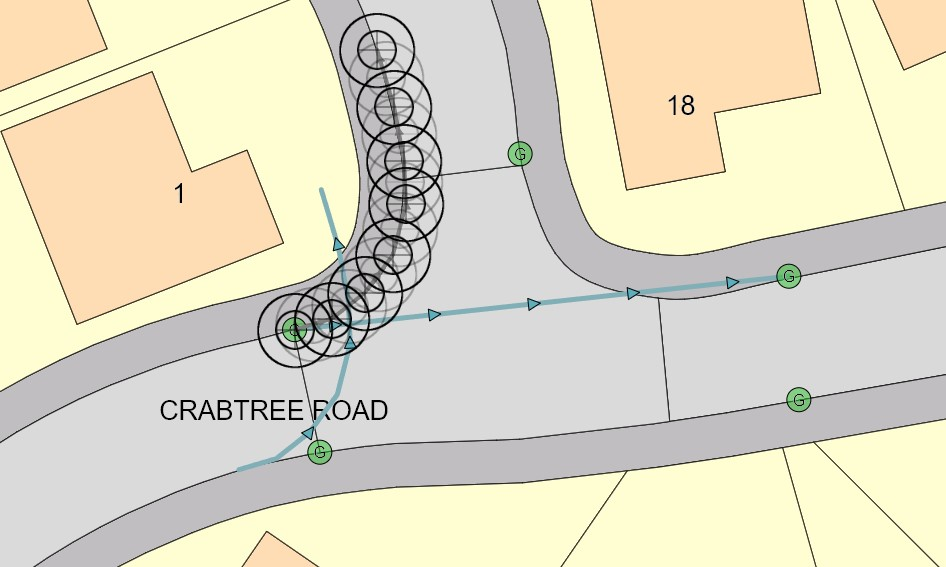
Note: When drawing the channel, you can tap as many points as you need, allowing you to draw curved channels (such as beanie blocks around a kerbline) and not just bends at a single point.
When adjusting a channel you have just drawn, the black targets are points that you have created. The grey targets are the centre points between the points you created.
You can tap and drag the black targets to move the points you have added, and tap and drag the grey targets to add new points.